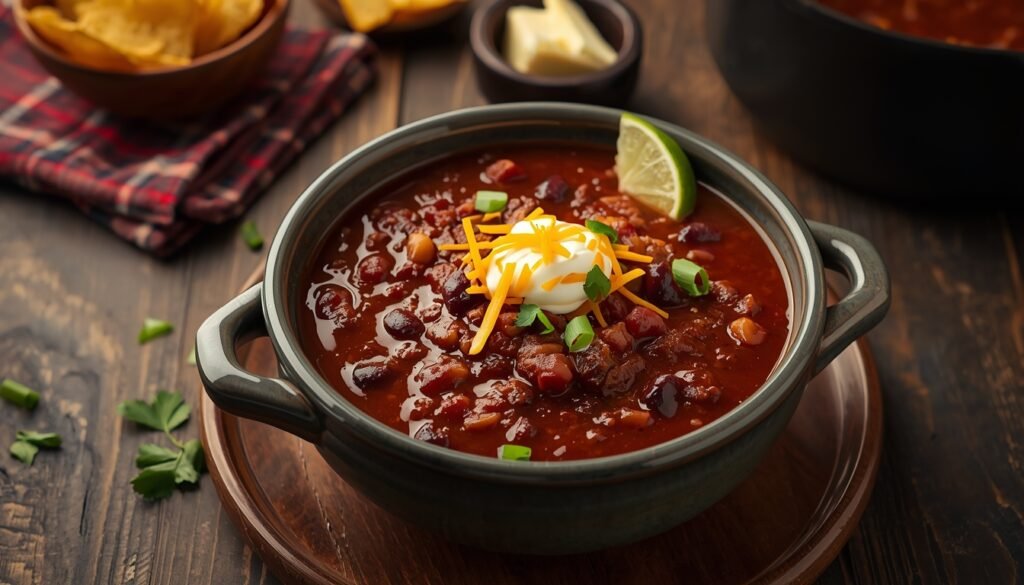


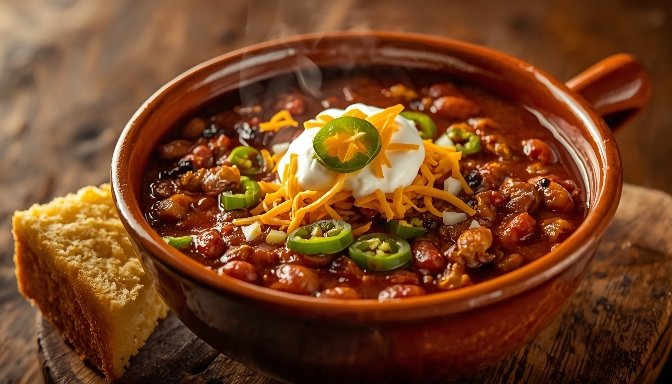
Before we get into the recipe, let’s acknowledge the elephant in the room. Authentic Texas chili — the kind that wins cookoffs in Terlingua and gets passed down through families like a legal document — traditionally contains no beans. Ask a Texan chili purist about beans and you’ll get a look that could curdle milk.
But here’s the thing: most people making chili at home want beans. They like the texture, the extra bulk, the way beans soak up the sauce and make the whole pot stretch further for a family dinner. That’s not a crime. That’s just cooking.

This article is about making a genuinely great Texas-style chili that happens to include beans — one that respects the spirit of the original (real dried chiles, proper beef, no shortcuts on flavor) while being something you’d actually want to make on a Tuesday night. It covers the recipe in full, the reasoning behind every meaningful decision, and the mistakes most people make that keep their chili from being as good as it could be.

The Honest Texas Chili Argument
Texas chili’s defining characteristic isn’t the absence of beans. It’s the chile pepper base. Real Texas chili is built on dried chiles — ancho, guajillo, pasilla, maybe a little chipotle for smoke — that are toasted, soaked, and blended into a sauce that forms the foundation of everything else. That’s what gives it depth, complexity, and that dark, almost mahogany color that you can’t fake with chili powder alone.
Most homemade chili recipes skip this entirely. They reach for a jar of commercial chili powder — a pre-mixed blend that’s often old, weak, and dominated by cumin — and wonder why the result tastes flat. The chile pepper base is the non-negotiable part. Beans are optional. The chiles are not.
So: this recipe uses dried chiles. It takes maybe twenty minutes more effort than dumping powder in a pot. The difference in the final bowl is not subtle.
Ingredients: What You Actually Need
This makes enough for 6 to 8 people, or four people with leftovers — which is always the right call because chili is better the next day.
For the Chile Base
- 4 dried ancho chiles (mild, rich, slightly sweet)
- 3 dried guajillo chiles (medium heat, bright, fruity)
- 2 dried chipotle chiles or 2 chipotles in adobo (smoke and heat)
- 2 cups beef broth, hot (for soaking)
If you can’t find dried chiles at your grocery store, look in the international foods aisle or a Latin American market. They keep for months in a sealed bag. Once you buy them, you’ll use them for everything.
For the Chili
- 3 lbs beef chuck, cut into ¾-inch cubes (not ground beef — more on this below)
- 2 tablespoons lard or vegetable oil
- 1 large yellow onion, diced
- 6 garlic cloves, minced
- 1 tablespoon ground cumin
- 1 teaspoon smoked paprika
- 1 teaspoon dried oregano, preferably Mexican oregano
- ½ teaspoon black pepper
- 1 teaspoon salt, plus more to taste
- 1 can (14 oz) diced tomatoes, or 2 fresh Roma tomatoes, roughly chopped
- 2 cups beef broth
- 1 tablespoon apple cider vinegar
- 1 teaspoon brown sugar (optional — balances acidity)
For the Beans
- 2 cans (15 oz each) pinto beans, drained and rinsed — or kidney beans if that’s what you have
- Or 1 cup dried pinto beans, soaked overnight and cooked separately until just tender
Canned beans work perfectly well here. Don’t let anyone convince you otherwise. The chili cooks long enough that the beans absorb the surrounding flavors and taste far better than they did from the can. Dried beans that you’ve cooked yourself have a slightly better texture, but the difference is modest.
Toppings (Optional but Encouraged)
- Shredded sharp cheddar
- Sour cream or crème fraîche
- Sliced jalapeños
- White onion, finely diced
- Fresh cilantro
- Lime wedges
- Corn chips or warm cornbread on the side
Equipment
A heavy-bottomed pot — a Dutch oven ideally — is important here. Chili benefits from even, steady heat that you can’t get from a thin-bottomed pan. Cast iron works. Enameled cast iron works even better.
You’ll also want a blender for the chile paste. An immersion blender can work in a pinch but the result won’t be as smooth.
The Recipe, Step by Step
Step 1: Toast and Soak the Dried Chiles
Remove the stems and seeds from all the dried chiles. Don’t skip this — the seeds add bitterness you don’t want.
Heat a dry skillet over medium heat. Add the chiles in batches and press them flat against the surface with a spatula. Toast for about 20 to 30 seconds per side — you want them to smell fragrant and darken slightly, but not burn. Burned chiles turn bitter and ruin the batch. Watch them closely.
Transfer the toasted chiles to a bowl or saucepan. Pour two cups of hot beef broth over them and weigh them down with a small plate so they stay submerged. Soak for 20 to 25 minutes until softened.
Transfer the chiles and their soaking liquid to a blender. Blend until completely smooth — a full minute, not a quick pulse. Strain through a fine-mesh sieve if you want an ultra-smooth sauce, but it’s not required. Set aside.
If you’re using chipotles in adobo instead of dried chipotles, add them directly to the blender with the other chiles.
Step 2: Prepare the Beef
Pat the beef cubes completely dry with paper towels. This step matters more than most people realize. Wet beef steams instead of searing, and if you don’t get a good sear, you miss the crust that adds depth to the whole pot.
Season the beef with salt and black pepper.
Heat the lard or oil in your Dutch oven over high heat until it’s shimmering. Add the beef in a single layer — work in batches, never crowd the pan — and sear for 2 to 3 minutes per side without moving it. You want deep brown color, not gray. Brown is flavor.
Remove each batch and set aside. Don’t pour off the fat — those browned bits at the bottom of the pot are going to do a lot of work.
Step 3: Build the Base
Reduce the heat to medium. Add the diced onion to the same pot and cook, stirring occasionally, for 6 to 8 minutes until softened and starting to turn golden. Scrape up the browned bits as the onion releases moisture — that’s the fond, and it’s valuable.
Add the garlic and cook for another minute until fragrant. Then add the cumin, smoked paprika, oregano, and black pepper. Stir and cook the spices for 60 seconds — this blooms them in the fat and makes them taste completely different than they would if you added them with the liquid.
Step 4: Add the Chile Paste and Liquid
Pour in the blended chile paste and stir everything together. It will sizzle and smell incredible. Let it cook for 2 minutes, stirring, before adding anything else. This toasts the chile paste slightly and intensifies it.
Add the tomatoes, the seared beef (along with any juices that have collected), and the remaining 2 cups of beef broth. Stir well. Bring to a boil, then reduce to a gentle simmer. The surface should barely bubble — not a rolling boil.
Cover with the lid slightly ajar and cook for 1 hour and 30 minutes.
Step 5: Add the Beans
After the beef has been simmering for 90 minutes and is becoming tender, add the drained beans. Stir to combine. At this point also add the apple cider vinegar and the brown sugar if you’re using it.
Continue simmering, lid ajar, for another 30 minutes. The beans should be heated through and starting to absorb some of the chile broth. The whole pot should look thick and glossy — not soupy.
Taste now and adjust salt. Chili almost always needs more salt than you’d expect at this stage.
Step 6: Rest Before Serving
This is skipped by most people and regretted by all of them. Turn off the heat, put the lid on fully, and let the chili rest for 15 to 20 minutes before serving. The flavors settle, the texture tightens, and the beans absorb a little more of the sauce. It’s noticeably better.
The Choice of Beef: Cubed vs. Ground
Most of the Texas chili tradition uses cubed beef rather than ground. The reason is texture. Cubed beef chuck, cooked slowly over a couple of hours, breaks down into tender, spoonable pieces that still have presence in the bowl. Ground beef becomes homogeneous — fine for many things, but it loses that sense of the meat being distinct from the sauce.
If you use ground beef — and plenty of people do, with excellent results — brown it thoroughly and drain excess fat before building the rest of the recipe. The flavor will be slightly different but still good.
Beef chuck is the right cut here because of its fat content and connective tissue. That connective tissue breaks down into gelatin over the long cook, which is what gives a great chili that slightly unctuous, coating quality in the sauce. Lean cuts get dry and stringy. Don’t use them.
A home cook in San Antonio who entered her adapted version of this recipe in a family cookoff said the single change that made the biggest difference to the judges was switching from ground beef to cubed chuck. Same spices, same beans, completely different result.
The Beans: Which Type Works Best
Pinto beans are the traditional choice when beans are included in Texas-adjacent chili. They have a creamy, mild flavor that doesn’t compete with the chile sauce and a texture that holds up through the extended simmer without turning to mush.
Kidney beans are the second most common choice — firmer, slightly earthier, and they hold their shape very well through long cooking. They also look dramatic in the bowl, which is not nothing.
Black beans work but bring their own strong flavor that can compete with the dried chiles. Use them if you love them, but know that the overall profile shifts.
One thing that applies to all of them: rinse canned beans thoroughly. The liquid in the can has a metallic, starchy quality that you don’t want in your chili. Rinse until the water runs clear.
Common Mistakes That Flatten the Flavor
Using Pre-Ground Chili Powder Instead of Dried Chiles
Standard commercial chili powder is a spice blend — typically chili, cumin, garlic, and oregano mixed together and often sold in small jars that have been sitting on a shelf for a year. It’s a useful pantry shortcut for many things but it can’t replicate what dried chiles bring. The freshness, the layered heat, the fruit notes — none of that survives the grinding and aging process.
If you genuinely can’t find dried chiles, use the best quality single-origin chili powder you can find, buy a fresh jar specifically for this recipe, and accept that the result will be somewhat flatter. But try the real thing at least once.
Rushing the Simmer
Chili cooked for 45 minutes and chili cooked for 2 hours are different foods. The long simmer is what develops the deep, integrated flavor and what tenderizes the beef. You cannot rush this. Low and slow is the only way.
Not Searing the Beef
Skipping the sear to save time is a false economy. The Maillard reaction — the browning of proteins at high heat — creates hundreds of flavor compounds that don’t form any other way. A properly seared pot of chili has a depth and complexity that an unseared one simply can’t achieve regardless of how many spices you add.
Undersalting
Chili is cooked in bulk over a long time, which means it needs more salt than you’d add to a quick pan sauce. Season the beef before searing. Season the onions as they cook. Taste and adjust after the beans go in. And taste again before serving. Each time you taste, the right amount is probably more than you’ve added.
Making It Ahead and Storing
Chili is one of the few dishes that genuinely improves with time. Made today, it will be good. Served tomorrow, it will be better. By day two, it’s hitting its peak.
Store cooled chili in a sealed container in the refrigerator for up to five days. Reheat gently on the stovetop with a splash of broth or water to loosen it — it thickens considerably when cold.
Chili freezes exceptionally well. Portion it into freezer containers or heavy-duty bags, remove as much air as possible, and freeze for up to three months. Thaw overnight in the fridge and reheat slowly. A batch of this frozen in single portions is genuinely one of the most useful things you can have in your freezer.
Authority link placement suggestion: Here, under the storage section or near the ingredients section, a reference to the Wikipedia article on chili con carne provides useful historical and culinary context about the dish’s origins and regional variations — grounding the recipe in the broader tradition it belongs to.
Adjusting Heat Level
The chile combination in this recipe — ancho, guajillo, chipotle — produces a medium heat level. Noticeable warmth that builds over eating but doesn’t overwhelm the flavor.
To make it milder: reduce or eliminate the chipotle, which carries most of the heat. Ancho and guajillo on their own are relatively gentle.
To make it hotter: add one or two dried arbol chiles to the toasting step. They’re small, thin, and extremely hot. Start with one and taste the blended sauce before committing. You can also add cayenne to taste during cooking.
A family in Austin with mixed heat tolerances makes two pots of this recipe at the same time — one with two arbol chiles added, one without. Both pots share the same base and beans. The hotter version gets a small notch cut in the lid so everyone knows which is which. Simple solution that works.
Serving Suggestions
With Cornbread
The classic pairing. A skillet of slightly sweet Southern cornbread alongside a bowl of this chili is one of the genuinely great simple meal combinations. The cornbread soaks up the chile broth and the textural contrast — crumbly, slightly crisp cornbread against thick, glossy chili — is satisfying in a way that’s hard to explain and easy to understand the first time you eat it.
Over Rice
Serving chili over a scoop of plain white or brown rice stretches it further and softens the heat slightly. This is standard in parts of Texas and common across the American South. The rice absorbs the sauce and makes the whole bowl more substantial.
As a Topping
Chili this thick and flavorful works as a topping for baked potatoes, over French fries (chili cheese fries are their own category of food that deserves full respect), or on hot dogs at a cookout. All of these are excellent.
A Note on the Bean Controversy
Since this article opened with it, it’s worth closing with it too. The no-beans rule in Texas chili comes from the competitive cookoff tradition — specifically from rules set by the Chili Appreciation Society International and events like the Terlingua Championship, where beans are indeed prohibited.
Those rules exist in a specific competitive context that has nothing to do with what you make at home for dinner. Home cooking has no rulebook. What matters is whether it tastes good and feeds the people you’re cooking for.
The best chili is the one that you make well, that your family eats happily, and that improves over three days in the fridge. Whether it has beans or not is honestly one of the least important things about it.
Authority link placement suggestion: Under this closing section or near the introduction, a reference to the Wikipedia article on the International Chili Society or competitive chili cooking provides genuine cultural context for the bean controversy — giving curious readers the background without requiring you to explain the whole history inline.
Quick Reference: Full Ingredient List
Chile Base: 4 dried ancho chiles, 3 dried guajillo chiles, 2 dried chipotle chiles (or chipotles in adobo), 2 cups hot beef broth
Chili: 3 lbs beef chuck (cubed), 2 tbsp lard or oil, 1 large yellow onion, 6 garlic cloves, 1 tbsp ground cumin, 1 tsp smoked paprika, 1 tsp dried oregano, ½ tsp black pepper, 1 tsp salt, 1 can diced tomatoes, 2 cups beef broth, 1 tbsp apple cider vinegar, 1 tsp brown sugar (optional)
Beans: 2 cans (15 oz) pinto beans, drained and rinsed
Cook time: approximately 2 hours 30 minutes total Serves: 6 to 8