

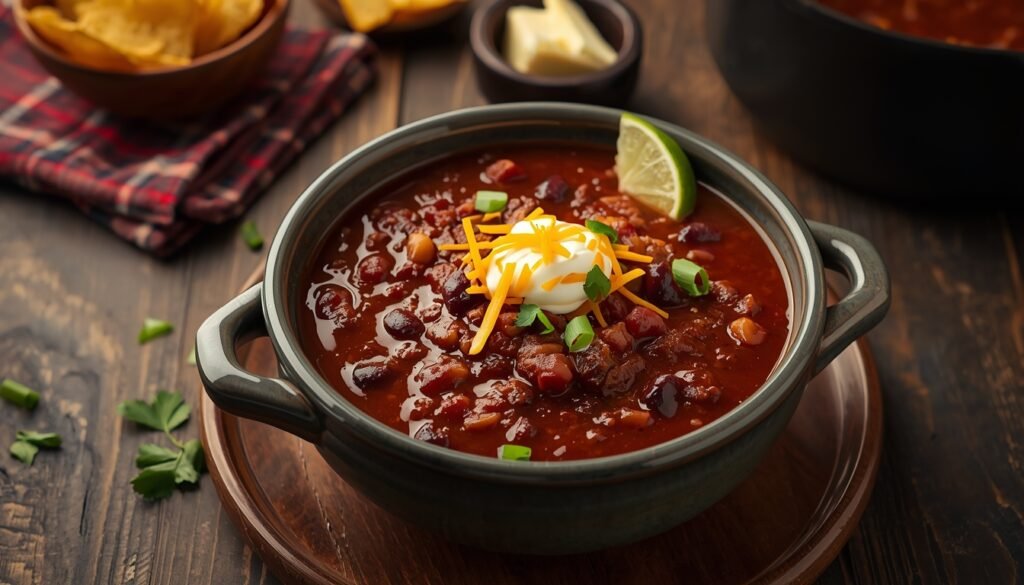
There are chili recipes that take three hours and require sourcing dried chiles from a specialty market. This isn’t that. This is the chili you make on a weeknight when it’s cold outside, you have an hour, and you want something that tastes like it took longer than it did.
That said — easy doesn’t mean bland. The difference between forgettable chili and genuinely good chili isn’t time or exotic ingredients. It’s a few specific techniques that most recipes skip over entirely. This article covers all of them, plus the complete recipe, the reasoning behind every decision that matters, and the mistakes that are worth knowing about before you start.

If you’ve made chili before and thought “it’s fine but something’s missing,” this recipe is probably what you were trying to make.

Why Ground Beef Chili Earns Its Place
Ground beef chili gets a slightly unfair reputation in serious cooking circles. Cubed chuck is more traditional, the argument goes, and gives better texture. That’s true. But ground beef has genuine advantages that make it the smarter choice for an easy weeknight recipe.
It cooks faster. It distributes more evenly through the sauce. It’s easier to find at any grocery store, and it’s typically cheaper per pound than chuck. When browned properly — in a hot pan, in batches, until it’s genuinely brown rather than just gray — ground beef develops real flavor that carries through a long simmer.
The fat content matters. An 80/20 blend (80% lean, 20% fat) is ideal for chili. The fat renders out during browning, carries the spices, and enriches the sauce. Leaner ground beef makes drier, less flavorful chili. If you’re using 90/10 because that’s what you have, add a tablespoon of olive oil to compensate.
A home cook in Denver who makes this recipe twice a month calls it her “30 minutes hands-on, the rest takes care of itself” dinner. That’s about right. The active cooking time is short. The simmer does the rest.
Ingredients
This serves 6 generously, or 4 people with enough left for lunch the next day — which is honestly the ideal outcome.
The Meat and Fat
- 1½ lbs ground beef, 80/20 blend
- 1 tablespoon olive oil or vegetable oil (only needed if using leaner beef)
The Aromatics
- 1 medium yellow onion, diced
- 1 green bell pepper, diced (optional but adds texture and a mild sweetness)
- 4 garlic cloves, minced
- 1 jalapeño, finely diced — seeds removed for mild, seeds in for medium heat
The Spice Blend
- 2 tablespoons chili powder (see note below)
- 1½ teaspoons ground cumin
- 1 teaspoon smoked paprika
- 1 teaspoon garlic powder
- ½ teaspoon onion powder
- ½ teaspoon dried oregano
- ½ teaspoon black pepper
- ¼ teaspoon cayenne pepper (more or less to taste)
- 1 teaspoon salt, plus more to taste
A note on chili powder: use a good one. Buy a fresh jar specifically for this recipe rather than using whatever has been in the cabinet for two years. Old chili powder loses its punch significantly. The quality of your chili powder is the single biggest variable in this recipe.
The Liquids and Base
- 1 can (14.5 oz) diced tomatoes, with juice
- 1 can (14.5 oz) crushed tomatoes or tomato sauce
- 1 cup beef broth
- 1 tablespoon tomato paste
- 1 teaspoon Worcestershire sauce
- 1 teaspoon apple cider vinegar
The Beans
- 1 can (15 oz) kidney beans, drained and rinsed
- 1 can (15 oz) pinto beans, drained and rinsed
Two types of beans gives you better texture and a more interesting bowl. Kidney beans hold their shape firmly through the simmer. Pinto beans soften slightly and absorb the surrounding sauce. Together they’re better than either one alone.
Optional Toppings
- Shredded cheddar cheese
- Sour cream
- Sliced green onions
- Fresh cilantro
- Diced white onion
- Sliced jalapeños
- Hot sauce
- Lime wedges
- Corn chips or warm cornbread
Equipment
You need one large, heavy pot. A Dutch oven is ideal — the thick walls distribute heat evenly and prevent hot spots that can scorch the tomato base. A large deep skillet or heavy-bottomed stockpot also works fine.
That’s genuinely it. One pot, one wooden spoon, a can opener, and a knife.
The Recipe: Step by Step
Step 1: Brown the Beef — Don’t Just Cook It
Heat your pot over medium-high heat. Add the ground beef — no oil needed if you’re using 80/20. Break it into rough chunks and leave it alone for 2 to 3 minutes. Let it develop color on the bottom before stirring.
This is where most people go wrong. They stir constantly and end up with steamed, gray meat. You want the beef to make contact with the hot surface long enough to brown. Brown beef has flavor. Gray beef does not.
Once the bottom has color, break it up more thoroughly and continue cooking until most of the pink is gone — around 6 to 8 minutes total. If there’s an excessive amount of rendered fat in the pot — more than about 2 tablespoons — drain some off. A little fat stays; a pool of fat goes.
Remove the beef and set aside temporarily. You’ll add it back shortly.
Step 2: Soften the Aromatics
In the same pot, over medium heat, add the diced onion and green bell pepper if you’re using it. Cook for 5 to 6 minutes, stirring occasionally, until the onion turns translucent and starts to soften. The bottom of the pot should have some browned bits from the beef — the onion’s moisture will help lift these, which is exactly what you want.
Add the garlic and jalapeño. Cook for another 60 to 90 seconds. You’ll smell the garlic immediately — that’s your timer. Don’t let it burn.
Step 3: Bloom the Spices
Add all the spices directly to the pot — chili powder, cumin, smoked paprika, garlic powder, onion powder, oregano, black pepper, cayenne, and salt. Stir them into the vegetables and cook for 60 seconds, stirring constantly.
This step is called blooming, and it makes a real difference. Spices contain fat-soluble flavor compounds that release more fully when they come into contact with heat and fat. Adding spices dry to the pot before the liquid goes in extracts significantly more flavor than adding them to a wet pot.
The mixture will look dry and fragrant. That’s correct. Don’t skip this step.
Step 4: Add the Tomato Paste
Push the vegetables to one side and add the tomato paste to an open spot in the center of the pot. Let it sit undisturbed for about 45 seconds, then stir it into everything. It will look dark and concentrated.
Cooking the tomato paste directly against the hot surface briefly — before adding liquid — caramelizes it slightly and reduces its raw, canned flavor. It becomes richer and more complex. Again: a small step, noticeable difference.
Step 5: Add the Beef Back and the Liquids
Return the browned beef to the pot. Add the diced tomatoes (with their juice), crushed tomatoes, beef broth, Worcestershire sauce, and apple cider vinegar. Stir everything together thoroughly.
Bring to a boil over high heat, then immediately reduce to a low simmer. The surface should bubble gently, not aggressively.
Step 6: Simmer
Cover with the lid slightly ajar and simmer for 30 minutes minimum. 45 minutes is better. An hour is best.
During this time, the flavors meld, the tomatoes break down further, and the sauce thickens. Stir every 10 to 15 minutes and check that nothing is sticking to the bottom. If the chili looks like it’s reducing too quickly, add a splash more broth.
Step 7: Add the Beans
After the chili has simmered and the beef has fully cooked through and absorbed the surrounding flavor, add the drained and rinsed beans. Stir to combine.
Simmer for another 15 to 20 minutes with the lid ajar. The beans will warm through and the sauce will continue to thicken slightly.
Taste now. Almost certainly you need more salt. Add it in small increments, tasting after each addition. Also taste for heat — if it needs more, a few shakes of hot sauce or a pinch of cayenne stirred in works perfectly.
Step 8: Rest and Serve
Turn off the heat, put the lid on fully, and leave it alone for 10 minutes. Resting the chili allows the flavors to settle and the sauce to thicken a little more. Every bowl after resting is better than every bowl served immediately.
Ladle into bowls and add whatever toppings you like. Don’t skip the toppings entirely — even just a handful of shredded cheddar and a spoonful of sour cream elevates the serving experience significantly.
The Spice Blend Explained
Chili spicing is where cooks develop personal signatures over time, and it’s worth understanding what each component does so you can adjust confidently.
Chili powder is the foundation. It’s typically a blend of ground dried chiles, cumin, garlic, and sometimes oregano. Its quality varies enormously between brands and freshness matters a great deal. It provides the characteristic deep red color and base flavor.
Cumin is earthy, warm, and slightly bitter. It’s essential to chili’s flavor identity. Under-cumin’d chili tastes flat. The amount in this recipe is intentionally on the higher side — reduce it if you find cumin overwhelming.
Smoked paprika adds a subtle smokiness without any actual smoke. It fills a role that used to be covered by fire-roasted chiles and works quietly in the background to add depth.
Cayenne is pure heat with minimal flavor complexity. Start with the amount listed and adjust to your threshold. It’s easier to add more than to fix a pot that’s too hot.
Worcestershire sauce is the ingredient people overlook. It adds umami — savory depth — and a subtle fermented quality that makes the beef taste meatier. A teaspoon disappears completely into the pot while doing significant work.
Apple cider vinegar is added near the end and balances the sweetness of the tomatoes with a small amount of acidity. Without it, chili made with canned tomatoes can taste slightly flat or one-dimensional.
Adjusting the Recipe to Fit Your Household
Making It Milder
Omit the jalapeño and the cayenne entirely. Use a mild chili powder. This produces a genuinely mild chili that’s appropriate for children or people with low heat tolerance — but still has full flavor from the other spices.
Making It Spicier
Add the jalapeño seeds. Double the cayenne. Add a second jalapeño or a half teaspoon of chipotle powder, which adds both heat and smoke. A few shakes of your preferred hot sauce stirred in at the end is the easiest adjustment.
Making It Thicker
If the chili is thinner than you’d like after the full simmer, remove the lid and increase the heat to a gentle boil for 10 minutes. The liquid will reduce and the sauce will tighten. Alternatively, mash about a quarter of the beans against the side of the pot with a spoon — the starchy paste thickens the sauce naturally.
Making It Stretch Further
Add a third can of beans. Add a cup of frozen corn in the last 10 minutes of cooking. Add a diced zucchini with the aromatics. All of these extend the pot without changing the flavor profile significantly.
A family of five in Nashville adds two cans of black beans alongside the kidney and pinto beans, plus a cup of frozen corn. It stretches the recipe to feed everyone twice — dinner tonight, lunch tomorrow — without any additional beef. The corn adds a slight sweetness that plays well against the spiced tomato base.
Bean Varieties: What Works and Why
Kidney Beans
The most traditional choice for ground beef chili. Dark red kidney beans have a firm texture that holds up well through long simmering, a mild slightly earthy flavor, and a substantial size that gives presence in the bowl. They don’t turn mushy. They don’t compete with the beef.
Pinto Beans
Creamier and softer than kidney beans, pintos absorb the surrounding sauce as they cook and become almost part of the base by the end of the simmer. They’re the most commonly used bean in Southwestern and Mexican cooking and bring a subtle earthiness that complements the chili spices well.
Black Beans
Firmer than pintos, with a slightly more pronounced flavor. They work well in this recipe but do shift the overall profile a bit. If you use black beans, rinse them especially thoroughly — the liquid in the can is darker and more starchy than with other varieties.
A Note on Rinsing
Whatever beans you use, drain and rinse them thoroughly. The liquid in canned beans — sometimes called aquafaba — has a starchy, slightly metallic quality that you don’t want in your chili. Rinse until the water runs clear. Thirty seconds of rinsing makes a real difference.
Authority link placement suggestion: Here, under the beans section, a reference to the Wikipedia article on common beans or kidney beans provides useful agricultural and culinary context on bean varieties — helpful for curious readers who want to understand what they’re working with.
Make-Ahead and Storage
The Next-Day Rule
Chili is one of the clearest examples in cooking of a dish that genuinely improves overnight. The spices continue to develop as the chili cools, the sauce thickens slightly, and the beans absorb more of the surrounding flavor. Making it the day before a gathering is not a compromise — it’s a strategy.
Cover and refrigerate overnight. Reheat gently on the stovetop over low to medium heat, stirring occasionally and adding a splash of broth or water if needed. It thickens significantly when cold.
Refrigerator Storage
Stored in a sealed container, this chili keeps well for 4 to 5 days in the refrigerator. The flavor peaks around day two and holds through day three. By day five it’s still fine but starts to fade.
Freezing
This recipe freezes exceptionally well. Let it cool completely, then portion into freezer containers or heavy-duty zip bags. Remove as much air as possible. Freeze for up to 3 months.
To thaw: transfer to the refrigerator the night before. Reheat on the stovetop over low heat. Add a small amount of broth to restore consistency if needed.
A practical approach many families use: double the recipe deliberately, eat half now, freeze half in individual portions for quick weeknight dinners. The frozen portions reheat in 10 minutes and taste just as good as fresh.
Authority link placement suggestion: Near this section or the introduction, a reference to the Wikipedia article on chili con carne provides the historical and cultural background of the dish — useful context that adds depth to an otherwise practical article and signals topical authority to search engines.
Serving Ideas Beyond the Bowl
Chili Dogs
A thick, beefy chili ladled over a hot dog in a soft bun, topped with shredded cheddar and mustard. This is a legitimate use of a good chili and requires no apology. It’s also one of the fastest ways to repurpose leftovers into something that feels completely different from the original meal.
Chili over Rice
A scoop of plain white or brown rice in the bottom of the bowl, chili ladled over the top. The rice absorbs the sauce, the portion sizes feel more substantial, and the total cost per serving drops. Common across the American South and genuinely satisfying.
Chili Baked Potatoes
Pierce a large russet potato several times, microwave for 8 to 10 minutes until tender, split open, fluff the interior with a fork, and ladle hot chili over the top with shredded cheese and sour cream. A complete meal from two separate components, each of which can be prepared quickly.
Frito Pie
Layer corn chips in a bowl, ladle chili over them, add shredded cheese and diced onion. The chips soften into the chili as you eat but retain just enough texture to be interesting. This is a stadium food classic in Texas and the American Southwest that works just as well at home on a couch during a Sunday game.
Chili Mac
Cook elbow macaroni separately, drain, and stir into the chili for the last 5 minutes of simmering. The pasta absorbs the sauce and the result is closer to a chili pasta bake than a traditional chili — heartier, even more filling, and an excellent way to feed a larger group. Top with cheese and broil briefly if you want a baked version.
Common Mistakes Worth Avoiding
Adding Beans Too Early
Beans added at the beginning of the simmer turn mushy by the time everything else is done. They should go in for the last 15 to 20 minutes — long enough to warm through and absorb some flavor, not so long that they fall apart.
Skipping the Aromatics
Some quick recipes skip directly from browning beef to adding spices and canned goods. The onion and garlic step is not optional if you want flavor with actual depth. Those 6 minutes of cooking the aromatics build a foundation that the rest of the chili is built on.
Not Tasting Before Serving
Chili needs adjustment at the end. Canned tomatoes vary in acidity. Different chili powder brands vary in heat and salt content. Ground beef absorbs salt differently depending on fat content. No recipe can account for all of these variables — which is why tasting and adjusting at the end is essential, not optional.
Serving Immediately Out of the Pot
As mentioned above: 10 minutes of rest after turning off the heat makes a real difference. It’s the smallest, easiest improvement you can make and most people skip it because they’re hungry and impatient. Set a timer and resist.
Quick Reference Card
Total time: 55 minutes to 1 hour 15 minutes Active cooking time: About 25 minutes Serves: 6
Ingredients at a glance: 1½ lbs ground beef (80/20) · 1 onion · 1 green bell pepper · 4 garlic cloves · 1 jalapeño · 2 tbsp chili powder · 1½ tsp cumin · 1 tsp smoked paprika · 1 tsp garlic powder · ½ tsp onion powder · ½ tsp oregano · ½ tsp black pepper · ¼ tsp cayenne · 1 tsp salt · 1 can diced tomatoes · 1 can crushed tomatoes · 1 cup beef broth · 1 tbsp tomato paste · 1 tsp Worcestershire · 1 tsp apple cider vinegar · 1 can kidney beans · 1 can pinto beans
The non-negotiables: Brown the beef until actually brown. Bloom the spices. Rest before serving. Taste and salt at the end.